Cooler Xtreme : Coolers
: Graphics / VGA Cooler : Full Review Of Blue Orb
Installation
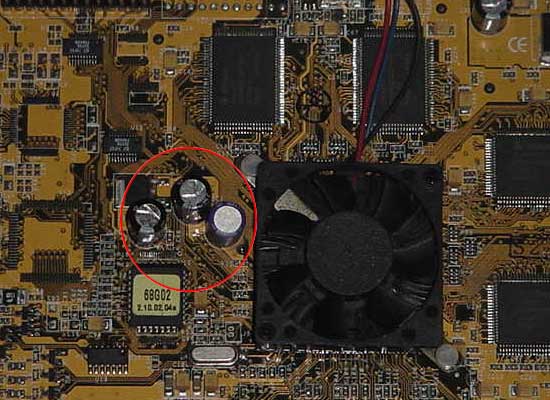
Originally
I was going to test the blue orb on an Asus v6800 32mb DDR but there was
a big problem. Not far away from the GPU were some capacitors that prevented
me from installing the orb properly.
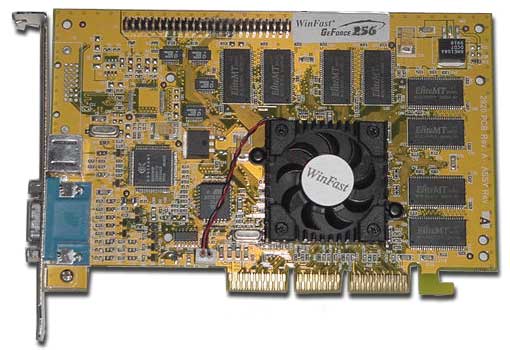
So instead
this is my victim, a Leadtek Winfast Geforce 1 32mb SDR.
I chose to test
the HSF against a Geforce 1 instead of a Geforce 2 or other card because
the GF1 uses a .22µ micron die while the GF2 uses a smaller .18µ process
which consumes less power resulting in less heat production, and also because
no other type of card is available that can produce the kind of heat that
a GF1 can. So with all that said I thought the GF1 would be better able
to show the potential of the orb then any other card.
Installation
of the orb can range anywhere from easy to difficult. If you had an Asus
v6800, like I did, it would be hard. You would probably have to snip some
pins off around the capacitors, or at least modify the orb in some way.
But you might be asking, "but Doug, couldn't you just slide the orb down
away from the capacitors?" Well you could, but the contact area on the orb
is a lot smaller then it appears to be. It barely, if at all, makes full
contact on the geforce GPU as it is. (On closer inspection the orb actually
does *not* completely cover the entire GF1 chip, the corners are exposed
ever so slightly).
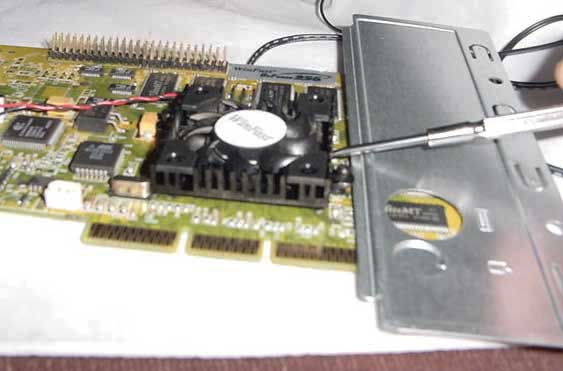
Installation
could also give you some trouble if the manufacturer of your card uses thermal
epoxy to secure the heatsink. Thermal epoxy is a really strong glue that
has good heat conducting properties, like thermal grease, only its adhesive.
I won't go into detail about how to remove a heatsink that has been thermal
epoxied, but I hear freezing it in the freezer for 20 minutes and then giving
it one of these: