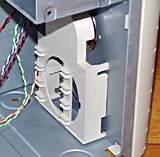
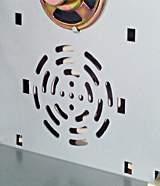
The inside of the HX 45, with
the fan-location-to-be...
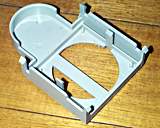
...at the bottom right. The
stock fan cradle...
...is as crummy as these things
usually are. It holds the fan too far away from the panel, so lots of air
can leak around the sides, and the holes in the panel themselves...
...are pretty small. But we
can fix that.
The first step after removing
the fan cradle is to remove the case's plastic front panel as well (which,
on the HX 45, means undoing a couple of screws before unclipping the panel).
If you can, remove the reset switch and LEDs from the front panel to avoid
damaging them or the cables. They're easy to remove from the HX 45 front
panel.
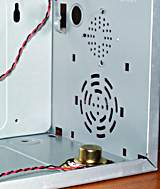
Removing the PC speaker. It's
clipped on three sides and held in by a nub of metal on the fourth; it's
easy to slide it out. Many cases use this mounting method. The big hole
I'm going to cut will take half of the PC speaker spot with it, so a new
position will have to be found for the speaker. No problem. Unscrew the
power supply as well, to avoid metal shavings falling into it.
.
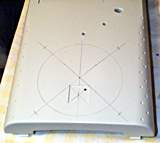
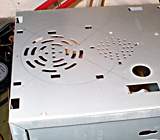
Marking out the front of the
chassis. You don't even have to have paid attention in high school metalwork
to be able to do this. Be accurate, though, if you care at all what your
computer ends up looking like.
A similar marking-out job on
the plastic front panel. Note the screw hole marks; the fan will screw to
the front of the steel chassis, but the finger guard will screw to the front
of the plastic panel. You could just as easily have the finger guard screwed
to the chassis, but I wanted the shiny thing visible!
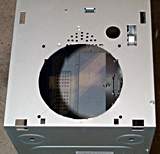
The fan and screw holes, all
done. It took me about an hour to cut and clean up, using the Dremel. In
case you're wondering why you shouldn't use a Dremel to cut a largish hole
like this.
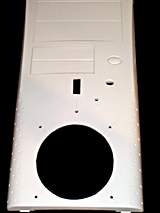
The matching holes in the front
panel. A much easier job; a Dremel goes through plastic like butter. The
only problem is easing off so you don't foul the cut with mounds of molten
plastic.
Note also the rectangular hole
for the fan switch. I didn't have a spare relay sitting around, but I did
have spare switches. So a switch it was.

 .
.